

F1 25 Aerodynamics Guide: Baseline Calibration & Monaco Example
Baseline-first F1 25 aerodynamics guide focused on wing settings, symptom mapping, a Monaco 50/50 proof-point, and a repeatable small-step test loop with exact recommended values.
On this pageTap to expand
Intro & Baseline (what to start with)
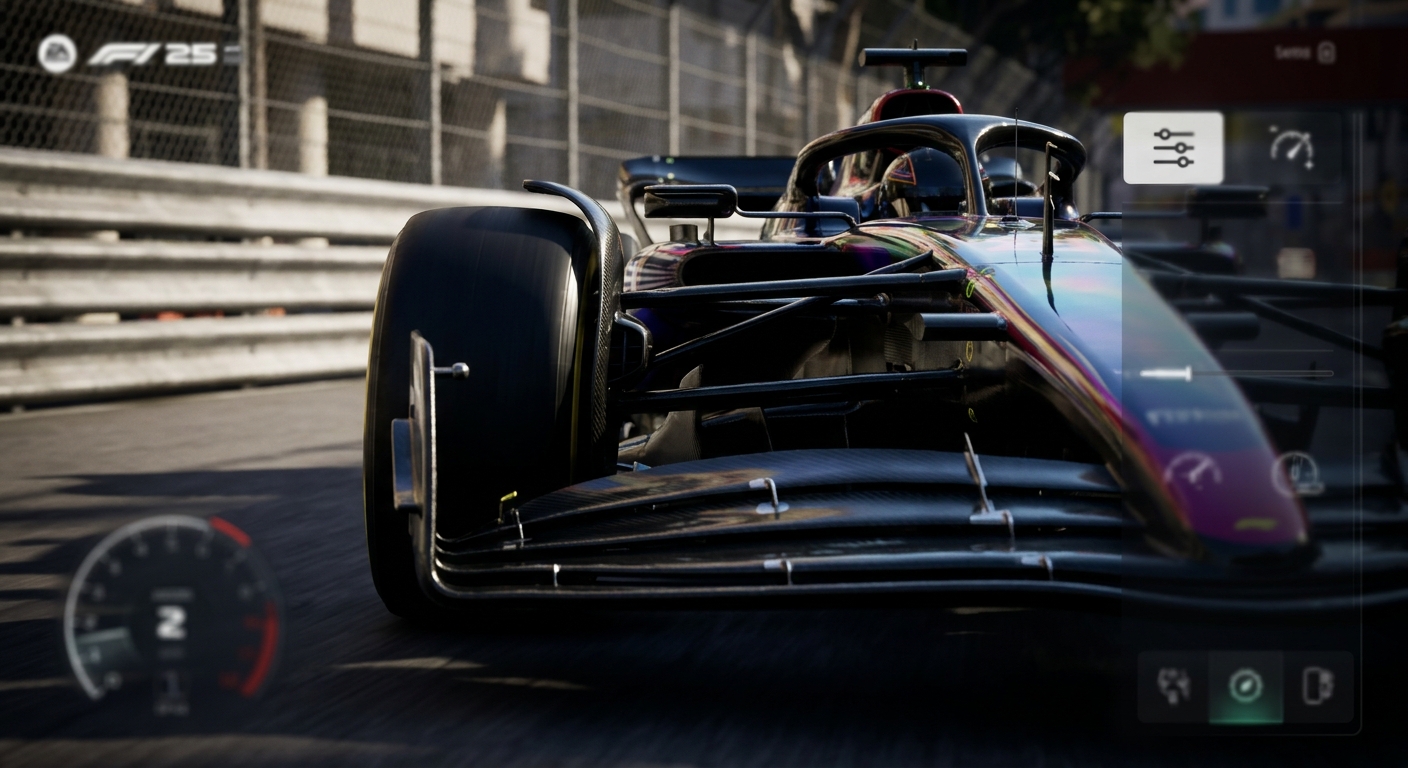
F1 25 aerodynamics guide — start every calibration loop from a single, proven baseline so lap-to-lap deltas are meaningful. For Circuit de Monaco the published baseline values (both Race and Qualifying setups) use Front Wing = 50 and Rear Wing = 50; use that 50/50 baseline to begin your tuning loop. Load the Monaco Race setup to ensure you’re comparing like-for-like before making changes (/f1-25/setups/monaco/f1-25-monaco-r).
Load the Monaco Race baseline
Start your first loop from the published Monaco Race setup (Front 50 / Rear 50).
Open Monaco — F1 25 Race Setup
Why baseline-first? Starting from the same wings (50/50) removes noise from other changes and lets you feel exactly what a wing tweak does to turn-in, mid-corner balance, exit traction and top speed. In short: front wing changes the initial bite and turn-in; rear wing controls exit stability and straight-line compromise. The rest of this F1 25 aerodynamics guide maps symptoms to single-setting changes so each loop is decisive.
What each aerodynamics setting changes (symptom mapping)
Use this section as a quick memory aid during a test loop. The F1 25 aerodynamics guide approach keeps changes isolated: adjust only the front or rear wing and expect the following sensations and risks.
- Front Wing — Increases front downforce and turn-in bite. Fixes entry understeer and allows earlier turn initiation. Over-correction: a nervous, twitchy front that locks earlier under braking and can cause front tyre overheating.
- Rear Wing — Increases rear downforce and exit stability. Fixes mid-corner or exit oversteer and reduces rotation on throttle. Over-correction: large loss of top speed on straights and increased wheelspin on exit without lap time improvement.
- Trade-off — Any wing increase raises total drag: you gain cornering grip at the cost of straight-line speed. The sensible player measures sector deltas: if corner gains do not offset straight-line losses, you are over-winged.
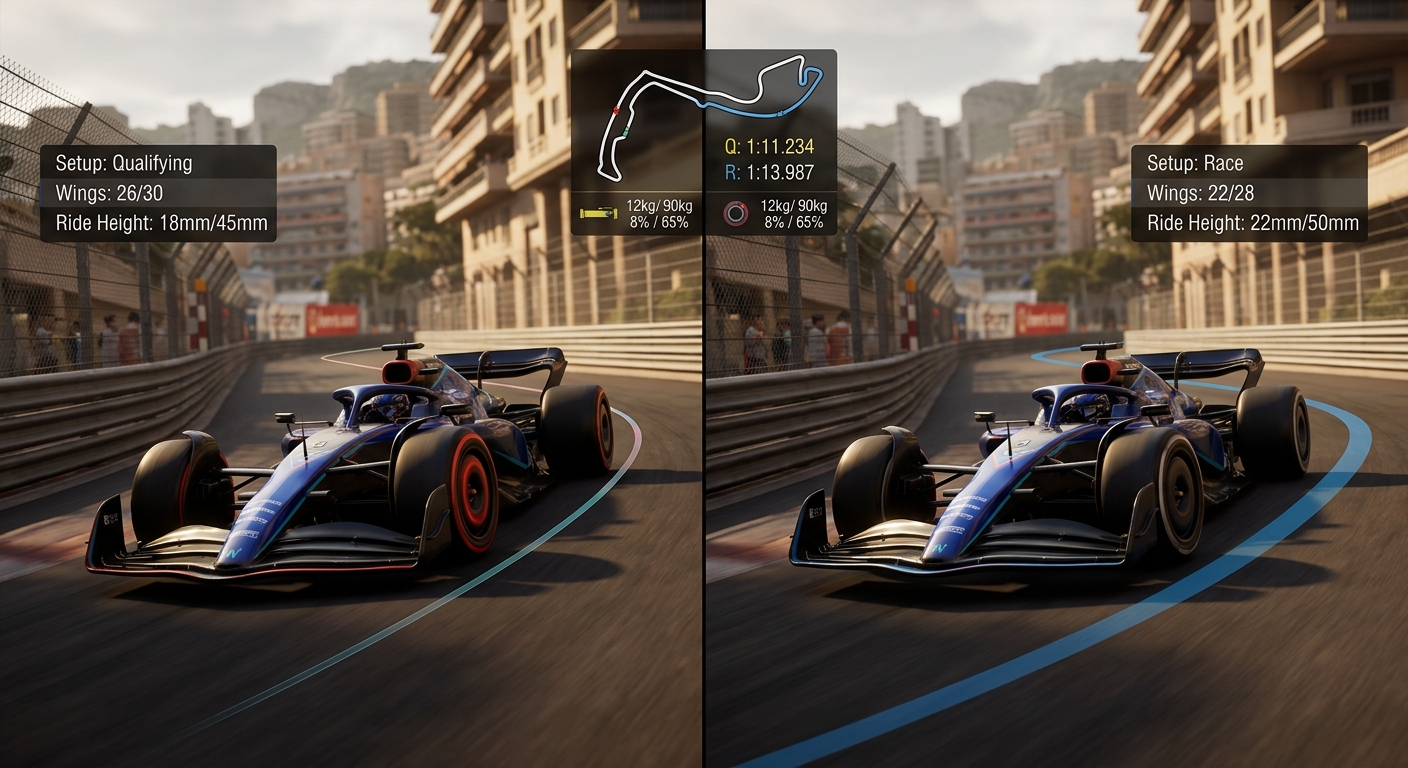
Compare the qualifying baseline
Open the Monaco Qualifying setup to see how the same wing values pair with different transmission and differential choices.
Open Monaco — F1 25 Qualifying Setup💡Read the feel, not just the numbers
If a single +2 front-wing change makes turn-in sharper but causes a front lock on the next braking zone, you’ve over-corrected. Revert to baseline and try +1 instead; small steps win over trying to fix everything in one large change.
Symptom-to-setting quick reference (what to change, how much)
Keep this as your in-session cheat sheet. The F1 25 aerodynamics guide method is: one symptom, one setting, one small step, then re-test.
- Persistent understeer at entry: increase Front Wing by +2 per iteration. Over-correction sign: twitchy front-end, earlier locking. If that happens, reduce by -1 to revert toward baseline.
- Rear instability on exit (oversteer): increase Rear Wing by +2 per iteration. Over-correction sign: significant top-speed loss on short straights and no sector time gain.
- Need more top speed on a medium straight: reduce Rear Wing by -2 per iteration and measure same-gear top-speed runs. Over-correction sign: sudden snap oversteer on exit.
- Mid-corner balance that shifts with tyre wear: prefer pit-stop incremental tweaks of +1 to +2 to the front wing to restore turn-in, rather than large full-race setup changes.
Back to the Monaco Race baseline
If you need to reset quickly between tests, reload the Monaco Race setup baseline.
Reload Monaco Race SetupMonaco Example: Race vs Qualifying baselines and on-track feel (concrete scenario)
This concrete Monaco scenario uses the published evidence to make the F1 25 aerodynamics guide tangible: both the Monaco Race and Qualifying setups list Front Wing = 50 and Rear Wing = 50. Use that shared baseline to isolate the effect of a single tweak.
Concrete on-track test scenario: load the Monaco Race setup (Front 50 / Rear 50 / On Throttle Differential 100% / Off Throttle Differential 25% / Front Camber -3.50° / Rear Camber -2.00°). Run three clean laps and note understeer at Mirabeau chicane. Make one change only: Front Wing +2 (to 52). Run three more clean laps and compare sector deltas and subjective feel.
Comparison note: the Qualifying setup lists Off Throttle Differential = 20% versus Race 25% — the wings are identical but differential tuning shifts rotation behavior for a single-lap push. If your +2 front-wing test helps turn-in but you lose too much straight-line speed, revert and instead adjust differential or try a +1 change.
Open Monaco Qualifying to compare differentials
See how the same 50/50 wing baseline pairs with a 20% off-throttle differential in qualifying.
Open Monaco — F1 25 Qualifying SetupRepeatable testing loop & small-step iteration (how to test changes)
A repeatable loop beats guesswork. Follow this exact sequence every time you change the wings so you can judge cause and effect.
- Step 0 — Start: load the Monaco Race baseline (Front 50 / Rear 50). Ensure same fuel load and tyre compound across runs.
- Step 1 — Clean lap baseline: run 3 consistent laps and note sector times and symptoms (e.g., understeer at turn-in, oversteer on exit, straight-line speed deficit).
- Step 2 — Adjust: change only one wing setting per loop. Use small steps: +2 or -2 per iteration; if you need micro-tuning, use +1 or -1 at pit-stop.
- Step 3 — Re-test: run 3 more consistent laps. Compare sector deltas and subjective feel, focusing on the corner where the symptom appeared.
- Step 4 — Decide: if lap time improves and feel is stable, repeat same small step. If worse, revert to previous setting and try the opposite direction or smaller increment.
- Stop conditions: if the change yields <0.05s improvement across three laps, treat it as ineffective. If over-correction (twitchy front, large top-speed loss) appears, revert immediately.
💡Single variable discipline
Never change both wings at once. One setting, one test loop. It’s the only way to know what produced the delta.
Translate a setting change to on-track feeling (example sensations)
Numbers are useful, but the driver must be able to recognise the sensation caused by a wing tweak. Use these concrete expectations to judge your runs without always checking telemetry.
- Front Wing +2 — Expectation: sharper turn-in, earlier rotation. Over-correction sign: front locks more under braking, car feels nervous entering corners.
- Rear Wing +2 — Expectation: safer exits, reduced sudden rotation on throttle. Over-correction sign: increased wheelspin on exit and noticeable top-speed loss on short straights.
- Rear Wing -2 — Expectation: higher top speed on medium straights. Over-correction sign: sudden snap oversteer on corner exit; reduce the change or add a small bit of front wing back.
Final recommended configuration (Monaco baseline and pit-stop tweak suggestions)
The final baseline values you should use for Circuit de Monaco are taken directly from the published setups. Use these as your copy-ready starting point, and apply pit-stop incremental tweaks when tyre wear or changing conditions introduce symptoms.
Monaco recommended baseline and common pit-stop tweak ranges
| Setting | Race Baseline | Qualifying Baseline | Pit-stop tweak guidance |
|---|---|---|---|
| Front Wing | 50 | 50 | +1 to +2 at stop to cure mild understeer; reduce by -1 if front becomes twitchy |
| Rear Wing | 50 | 50 | +1 to +2 at stop to add exit stability; reduce by -1 to -2 for short-straight top-speed gains |
| On Throttle Differential | 100 % | 100 % | Keep as published; major handling shifts come from wing/differential combos |
| Off Throttle Differential | 25 % | 20 % | Qualifying uses 20% for sharper single-lap rotation; race uses 25% for stability over stints |
| Front Camber | -3.50 ° | -3.50 ° | Camber changes affect tyre temperature and grip; adjust separately from wings |
| Rear Camber | -2.00 ° | -2.00 ° | Keep consistent with publisher baseline; change only if tyre wear signals imbalance |
Copy the Monaco Race baseline
Load the exact configuration used in this guide to reproduce the test loop in your session.
Load Monaco Race SetupFAQ
How many wing steps should I test per loop?
Use small steps: +2 or -2 for initial iterations. If a change helps but is harsh, use +1 or -1 at a pit-stop for micro-adjustment. Always run three clean laps before deciding.
If both turn-in and exit feel off, which do I change first?
Start with the front wing to address turn-in issues. If exit instability persists after front adjustments, use small rear-wing steps next. Change only one wing per loop.
Are the 50/50 wings specific to Monaco?
Yes — Monaco is a high-downforce, slow-speed street circuit. The site-published Monaco Race and Qualifying setups both use Front Wing = 50 and Rear Wing = 50 as the reliable baseline for this track.
Keep Exploring
Continue from this guide with related hubs and circuit pages.
Related Setups
Apply the knowledge from this guide with a ready-made setup.